|
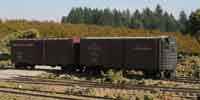
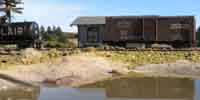
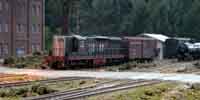
(2) I shot these three pictures in the early morning. The quality of the light
streaming in at a low angle is stunning. Note how the foreground trees and
background trees blend together.
|

|
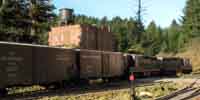
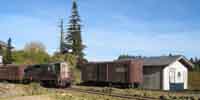
(3) The low angle of the light here makes for contrasty pictures. Not much of
the real trees and hills in the background is discenable here.
|
|
(4) The underbrush at the right rear of this picture is actually a plum orchard!
|
|
|
|
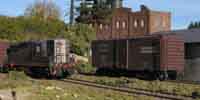
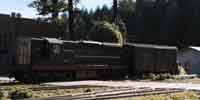
(5) These three pictures were taken in the mid-afternoon. Not how much harsher this light
is compared with the morning light in the previous photos.
|
|
(6) This shot would have been extremely difficult indoors. The reflections in the
water would have to have been carefully analyzed to ensure non-sceniced areas
did not show (such as the edge of the sky!). Outdoors however the sky has no
edges so there's nothing to worry about!
|
|
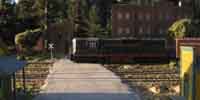
(7) Well almost nothing to worry about. I was incautious with the framing of this
shot and got the corner of the garage in it. A most out-of-scale element...
|
|
|
|
(8) Backlit shots can be very dramatic. But the intense contrast can be very
hard to control. The bright spots are VERY bright and the dark spots are
VERY dark. I should have used a bounce card to soften the shadows (but I
didn't think of it).
|
|
(9) Backlit shots can be very dramatic. But the intense contrast can be very
hard to control. The bright spots are VERY bright and the dark spots are
VERY dark. I should have used a bounce card to soften the shadows (but I
didn't think of it).
|
|
|

|
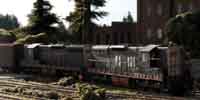
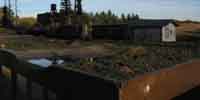
(10) The sun is just seconds from disappearing behind the trees to the west. This
last light has a wonderfully warm quality to it. The relatively low angle helps
draw out the shadows.
|
|
|

|
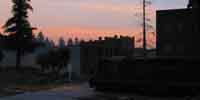
(11) The sun has just gone down behind the trees leaving a rather flat bluish
light (blue because the sky is now the biggest source of illumination. Contrast
this flat light with the previous picture.
|
|
(12)  Similar to photo (11) but with a longer lens. Notice the trees in the background
appear significantly larger due to foreshortening effects.
Similar to photo (11) but with a longer lens. Notice the trees in the background
appear significantly larger due to foreshortening effects.
|
|
|
|
(13)
The foreground silhouetted against a little bit of sunset.
|

|
Things to consider outdoors
There appear to be a few things to think about when photographing HO models
outdoors (other scales will possible have slightly different considerations).
- A still day works best. Wind is not your friend. It can and will blow portions
of the layout that aren't firmly attached away.
- Pay attention to where the layout ends and the background starts. This
transition can be tricky. It's best if there is no direct connection between
the layout and the background.
- Full size objects in the background will appear to be about 87 times closer
than they are (for HO scale). The plum trees in picture (4) are about 150 real
away from the timesaver. This makes them appear as though they were a little
less than 2 feet beyond the timesaver.
- Shoot at a low angle. It makes for more realistic feeling pictures. Plus
it makes it harder to see that nasty line between layout and reality. If the
end-of-the-world problem can be seen, try placing something in the way. Rolling
stock and buildings make good view blocks.
- Use the smallest apperature your camera allows. On my digital this is F8
(on my film camera it's F32). This will maximize depth of field. Depth of
field is your friend - it's a real trick to get trains less than two feet
from the camera to be in focus at the same time a background hundreds of
feet aways is also focused.
- Watch out for little critters on the layout - a bug bigger than the people
on the layout would be horendous (or maybe fun!)
- Position the layout, rolling stock, structures and camera carefully to
get the best use of the light. Back lighting with real sunlight is dramatic
but extremely hard to control the black shadows and intense contrast. Consider
using a bounce card (a sheet of something white) to reflect some fill light
into the scene.
Here are a couple of pictures illustrating the setup I used for these pictures.
|
|
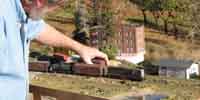
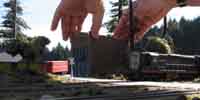
(14) My good friend Terry Roberts helped out with these pictures. Here he's positioning
a boxcar. The 18"x6' layout is perched on the deck railing. In the background
is the neighbor's orchard.
|
|
(15) Here's the uncropped version of the last-second sun picture (9) clearly showing
that the world is indeed flat and what's more it appears to be framed with
1/4" birch plywood!
|
|
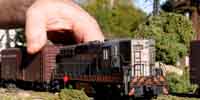
(16) NEWS FLASH! Train attacked by horrible giant. Crew terrified!
|
|
(17)
NEWS FLASH! Town attacked by horrible giant. Towns people terrified!
|
|
|