 |
|
Roads shouldn't be too perfect |
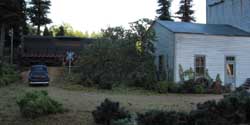
(click 'em to expand 'em) 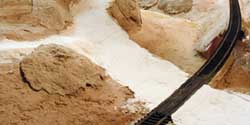 Spackle base before painting (but before weathering). 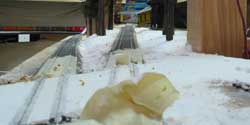 Spackle base with grade X-ing timbers. 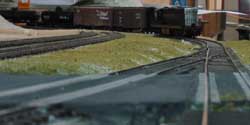 From the opposite direction after painting. 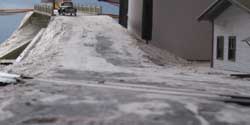 The spackle base wasn't good enough so I added a second layer. 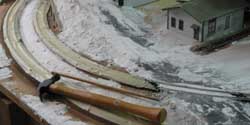 Spackle base before painting. 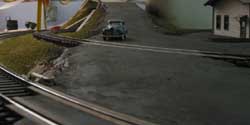 The same road after painting. 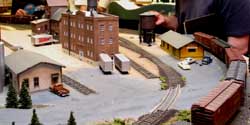 The scene from a different angle after weathering and trees. 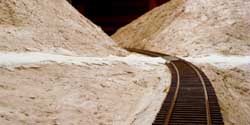 Spackle and a grade X-ing. 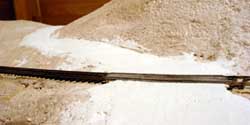 From a different angle. 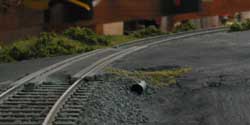 A drinking straw drain pipe next to a grade crossing. |
Roads for the BC&SJ
I read in a book on scenery techniques about Sponge Modeling for roads. Actually it turned out that the roads were made from spackle (dry wall compound) not sponges. I start by making a stable sub-roadbed using plywood or hardshell. I'ts important that this not flex or the layers above it will crack and chip off. On this I apply a layer of sculptamold getting it as smooth as I can using a putty knife. I let this dry completely. I find that a thick layer of Sculptamold can take about forever to dry. Keep you thicknesses down to 1/4 inch. Drying can be considerably speeded up by using a small fan to blow on the area. When the Sculptamold is dry I apply a layer of spackle (dry wall compound) to the road surface. I smooth it out the best I can with the putty knife and let it dry. If there are any huge irregularities in the road surface you might want to either sand them off or fill them in with another layer of spackle. Keep the spackle layers to 1/8" or less or you will get major cracks. Once the spackle is dry it's time for that sponge. Get the sponge (don't use the one from the kitchen sink, once you make roads with it you won't want it anywhere near the dishes or pots and pans). Dip it in a bucket of water and wring it out. Dip it again and place it on the road surface. Beging wiping the road with it. At first nothing much will happen but keep at it frequently washing out the sponge in the water bucket. In a little while the top layer of the spackle will soften up and begin to move around filling in the crevices and smoothing out. Work at the road until it seems smooth. If you're making a one lane dirt road with wheel tracks now is a good time to get those ruts started. I use two fingers held tightly together to wipe the spackle and depress (slightly) where the wheels will go. Let the spackle dry again. You may want to VERY lightly sand the road surface to get out any smear marks left by the sponge. Vacuumn up all the spackle dust right away - if it gets airborne it will coat everything in the train room with a very fine white powder.
Asphault Roads Arizona Rock and Mineral makes some scale asphault powder. I've tried painting the road and then sprinkling on this stuff while the paint is still wet to give the road a grittier texture.
Center Stripes I made a little stripe jig out of two pieces of .010" styrene which I glued to some cross members 6 scale inches apart. I apply the paint using a dry brush dabbing techinique. Get some paint on the brush (I used reefer yellow) and wipe most of it off. I align the template where I want the stripe and dab the brush until the stripe is as dark as I want. For continuous stripes mask the road with masking tape. Be sure to apply weather on top of the paint stripes (unless you're modeling a fresh paint job).
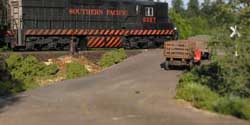
Tar and Gravel Roads Dirt Roads Very little looks more like dirt than dirt. I try to find a color of paint that is similar to the dirt color I use (I got an interesting look from the paint consultant at Home Depot when I showed up asking them to scan some dirt I'd brought to get a computer color match!). I use latex paint the same color I use for my scenery basecoat. I apply it a little at a time and sprikle on the finely ground and sifted dirt. I can't overemphasize the importance of grinding the dirt in HO and smaller scales. Merely sifting it isn't good enough - it will be far to chunky for a road surface. When the paint is dry I use my hand and/or fingers to wipe the dirt surface and smooth it out (like when I may dirt roads in the back yard as a kid). Use two fingers held close together to make the worn down areas of the road where the tires go. When this is dry apply a LITTLE bit of chunkier dirt or rocks to the edges and middle of the dirt road. Optionally you might want to add some green ground foam for an infrequently traveled road or use some Sil-Flor. Grade Crossings I've modeled three styles of grade crossing on my layouts.
Timbered grade crossings When the crossing is functionally ok I bevel the ends of the ties (so they're less likely to snag dragging equipment such as dropping magnetic coupler glad hands) and paint an India Ink and alcohol mixture on the ties to stain them. I repeat the staining until they're dark enough to suit me. When laying the ties don't be too neat about it. You'll want so spaces to show between the individual ties. Un-timbered Grade Crossings For these I just run the spackle right across the rails. Once the spackle is setting up I use the flangeway end of an old NMRA gauge to clear the flangeways. When the road is completely dry I sand it down to a tops of the railheads. If this will be a dirt or gravel road crossing I sand it down a bit more to make room for the dirt layer. |
 No grade X-ing timbers. 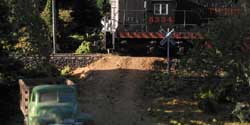 No grade X-ing timbers. 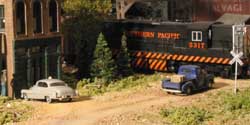 No grade X-ing timbers. 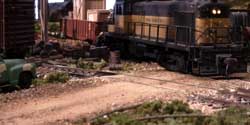 No grade X-ing timbers. |
You don't have to be a Roads Scholar (pun intended) to make
realistic roads. Be willing to make some mistakes and persistance will
pay off. Here I present a veritable Roads Gallery of various road types I've built. (click 'em to expand 'em) Tar and Gravel Roads 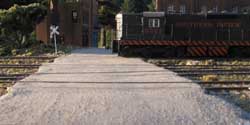 Fine ballast sprinkled in wet paint looks like tar and gravel. |
 Asphault pavement. 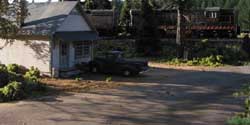 Asphault pavement with cracks. 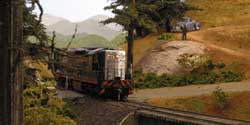 Asphault pavement with fully timbered crossing. 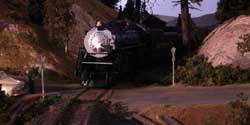 Asphault pavement with fully timbered crossing. |